
WP7のPrismでInteractionRequest使うときにはまったのでメモ。
はじめに
出したい!と思って以下のエントリも参考にしつつ実装してみる。
そしたら、XAMLを書くところで、
エラー 2 The tag 'InteractionRequestTrigger' does not exist in XML namespace 'clr-namespace:Microsoft.Practices.Prism.Interactivity.InteractionRequest;assembly=Microsoft.Practices.Prism.Interactivity'.とかなってうまくいかない。困った。
Prism for Phone updated for Mango
調べてみたらPrism for Phone updated for Mangoでこんなことに。
Microsoft.Practices.Prism.Interactivity was also updated to a 7.1 SDK project as well as the following updates:そして。
- Removed BindingListener and InteractionRequestTrigger
- Updated ApplicationBarButtonCommand
InteractionRequestTrigger was deprecated in favor of EventTrigger provided by the Expression Blend SDK for Silverlight.ということでInteractionRequestTriggerがなくなってる。
そのかわりEventTrigger使えっていうことなので、EventTrigger使って書いたのがこちら↓。
ソース
Mainview.xaml
<phone:PhoneApplicationPage
    x:Class="BindableApplicationBarTest.MainPage"
    xmlns="http://schemas.microsoft.com/winfx/2006/xaml/presentation"
    xmlns:x="http://schemas.microsoft.com/winfx/2006/xaml"
    xmlns:phone="clr-namespace:Microsoft.Phone.Controls;assembly=Microsoft.Phone"
    xmlns:shell="clr-namespace:Microsoft.Phone.Shell;assembly=Microsoft.Phone"
    xmlns:d="http://schemas.microsoft.com/expression/blend/2008"
    xmlns:mc="http://schemas.openxmlformats.org/markup-compatibility/2006"
    xmlns:fx="clr-namespace:Phone7.Fx.Controls;assembly=Phone7.Fx"
    xmlns:i="clr-namespace:System.Windows.Interactivity;assembly=System.Windows.Interactivity"
    xmlns:local="clr-namespace:BindableApplicationBarTest"
    mc:Ignorable="d" d:DesignWidth="480" d:DesignHeight="768"
    FontFamily="{StaticResource PhoneFontFamilyNormal}"
    FontSize="{StaticResource PhoneFontSizeNormal}"
    Foreground="{StaticResource PhoneForegroundBrush}"
    SupportedOrientations="Portrait" Orientation="Portrait"
    shell:SystemTray.IsVisible="True">

    <!-- EventTrigger の設定 -->
    <i:Interaction.Triggers>
        <i:EventTrigger SourceObject="{Binding ExecRequest}" EventName="Raised">
            <local:ExecAction />
        </i:EventTrigger>
    </i:Interaction.Triggers>

    <!--LayoutRoot は、すべてのページ コンテンツが配置されるルート グリッドです-->
    <Grid x:Name="LayoutRoot" Background="Transparent">
        <Grid.RowDefinitions>
            <RowDefinition Height="Auto"/>
            <RowDefinition Height="*"/>
        </Grid.RowDefinitions>

        <!--TitlePanel は、アプリケーション名とページ タイトルを格納します-->
        <StackPanel x:Name="TitlePanel" Grid.Row="0" Margin="12,17,0,28">
            <TextBlock x:Name="ApplicationTitle" Text="マイ アプリケーション" Style="{StaticResource PhoneTextNormalStyle}"/>
            <TextBlock x:Name="PageTitle" Text="ページ名" Margin="9,-7,0,0" Style="{StaticResource PhoneTextTitle1Style}"/>
        </StackPanel>

        <!--ContentPanel - 追加コンテンツをここに入力します-->
        <Grid x:Name="ContentPanel" Grid.Row="1" Margin="12,0,12,0">
            <StackPanel>
                <Button
                Content="Exec"
                Command="{Binding ExecCommand}"/>
            </StackPanel>
        </Grid>
        <!--
        <fx:BindableApplicationBar x:Name="AppBar">
            <fx:BindableApplicationBarIconButton
                Command="{Binding ExecCommand}"
                Text="add"
                IconUri="appbar.like1.rest.light.png">
            </fx:BindableApplicationBarIconButton>
        </fx:BindableApplicationBar>
        -->
    </Grid>

    <!--ApplicationBar の使用法を示すサンプル コード-->
    <!--<phone:PhoneApplicationPage.ApplicationBar>
        <shell:ApplicationBar IsVisible="True" IsMenuEnabled="True">
            <shell:ApplicationBarIconButton IconUri="/Images/appbar_button1.png" Text="Button 1"/>
            <shell:ApplicationBarIconButton IconUri="/Images/appbar_button2.png" Text="Button 2"/>
            <shell:ApplicationBar.MenuItems>
                <shell:ApplicationBarMenuItem Text="MenuItem 1"/>
                <shell:ApplicationBarMenuItem Text="MenuItem 2"/>
            </shell:ApplicationBar.MenuItems>
        </shell:ApplicationBar>
    </phone:PhoneApplicationPage.ApplicationBar>-->

</phone:PhoneApplicationPage>
</pre>
MainPage.xaml.cs
using System;
using System.Windows.Interactivity;
using Microsoft.Phone.Controls;
using Microsoft.Practices.Prism.Interactivity.InteractionRequest;

namespace BindableApplicationBarTest
{
    public partial class MainPage : PhoneApplicationPage
    {
        // コンストラクター
        public MainPage()
        {
            InitializeComponent();
            this.DataContext = new MainViewModel();
        }
    }

    public class ExecAction : TriggerAction
    {
        protected override void Invoke(object parameter)
        {
            var e = parameter as InteractionRequestedEventArgs;
            if (e == null)
            {
                return;
            }

            var c = e.Context as Confirmation;
            MessageBoxResult result = MessageBox.Show(
                (string)c.Content,
                c.Title,
                MessageBoxButton.OKCancel);
            c.Confirmed = result == MessageBoxResult.OK;

            e.Callback();
        }
    }
}
MainViewModel.cs
using System;
using Microsoft.Practices.Prism.ViewModel;
using Microsoft.Practices.Prism.Interactivity.InteractionRequest;
using Microsoft.Practices.Prism.Commands;

namespace BindableApplicationBarTest
{

    public class MainViewModel : NotificationObject
    {
        DelegateCommand _execCommand;
        public DelegateCommand ExecCommand
        {
            get
            {
                if (_execCommand == null)
                {
                    _execCommand = new DelegateCommand(_exec, _canExec);
                }
                return _execCommand;
            }
        }

        bool _canExec()
        {
            return true;
        }

        void _exec()
        {
            ExecRequest.Raise(
                new Confirmation()
                {
                    Title = "Confirm",
                    Content = "Execute?"
                },
                c =>
                {
                    MessageBox.Show("Confirmed: " + c.Confirmed);
                });

        }

        #region ExecRequest

        InteractionRequest _execRequest;
        public InteractionRequest ExecRequest
        {
            get
            {
                if (_execRequest == null)
                {
                    _execRequest = new InteractionRequest();
                }
                return _execRequest;
            }
        }

        #endregion
    }
}
動作確認
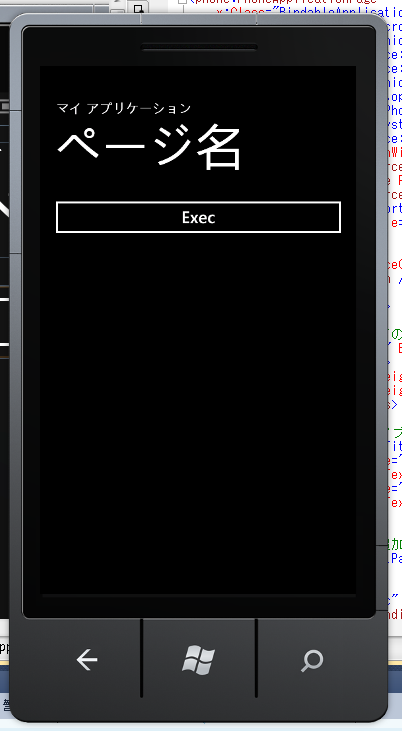
何もしてない状態

Execボタンを押した応対。確認ダイアログが出る

「ok」を選択した状態
ばっちり、確認ダイアログを出せました。
画像出してないけど、「キャンセル」を選ぶとちゃんと「Confirmed: False」になります。
0 件のコメント:
コメントを投稿